
Cognitoで認証するReactアプリをAmplify v6で作成する
第2回となる今回は、Cognitoで認証するReactのフロントエンドアプリを作っていこうと思います。
ちなみに第1回を読んでないよーという方はコチラ。

ReactでCognitoを扱う際、Amplifyライブラリを使うと思いますが、以前作ったアプリがv6になって全く動かなくなっていたので少々ビックリしました。
それでは早速作っていきましょう!
プロジェクトを作成したい1つ上のフォルダで以下のコマンドを実行して、プロジェクトを作成します。
|
1 |
npm create vite@latest |
以下のようなメッセージが表示されたら(バージョンは環境によって違うかも)、そのままEnterします。
|
1 2 3 |
Need to install the following packages: create-vite@5.5.2 Ok to proceed? (y) |
プロジェクト名を入力します。ここではmiso-frontendとしています。
|
1 |
? Project name: » miso-frontend |
カーソルを移動し、Reactを選択します。
|
1 2 3 4 5 6 7 8 |
? Select a framework: » - Use arrow-keys. Return to submit. Vanilla Vue > React Preact Lit Svelte Others |
カーソルを移動し、TypeScript + SWCを選択します。
|
1 2 3 4 5 6 |
? Select a variant: » - Use arrow-keys. Return to submit. TypeScript > TypeScript + SWC JavaScript JavaScript + SWC Remix ↗ |
するとプロジェクトが自動的に作成されます。
できたプロジェクトのフォルダ配下にあるvite.config.tsを編集し、Viteの設定を変更します。
|
1 2 3 4 5 6 7 8 9 10 11 12 13 14 15 16 17 18 19 20 21 22 23 24 25 26 27 |
import { defineConfig } from 'vite' import react from '@vitejs/plugin-react-swc' // https://vitejs.dev/config/ export default defineConfig({ server: { open: true, port: 3000, }, base: "/", root: "src", publicDir: "../public", build: { outDir: "../dist", emptyOutDir: true, }, envDir: "../", resolve: { alias: { "./runtimeConfig": "./runtimeConfig.browser", }, }, define: { global: {}, }, plugins: [react()], }) |
index.htmlをsrc以下に移動し、以下のようにタイトルとmain.tsxのパスを変更します。
|
1 2 3 4 5 6 7 8 9 10 11 12 13 |
<!doctype html> <html lang="en"> <head> <meta charset="UTF-8" /> <link rel="icon" type="image/svg+xml" href="/vite.svg" /> <meta name="viewport" content="width=device-width, initial-scale=1.0" /> <title>Password Generator</title> </head> <body> <div id="root"></div> <script type="module" src="./main.tsx"></script> </body> </html> |
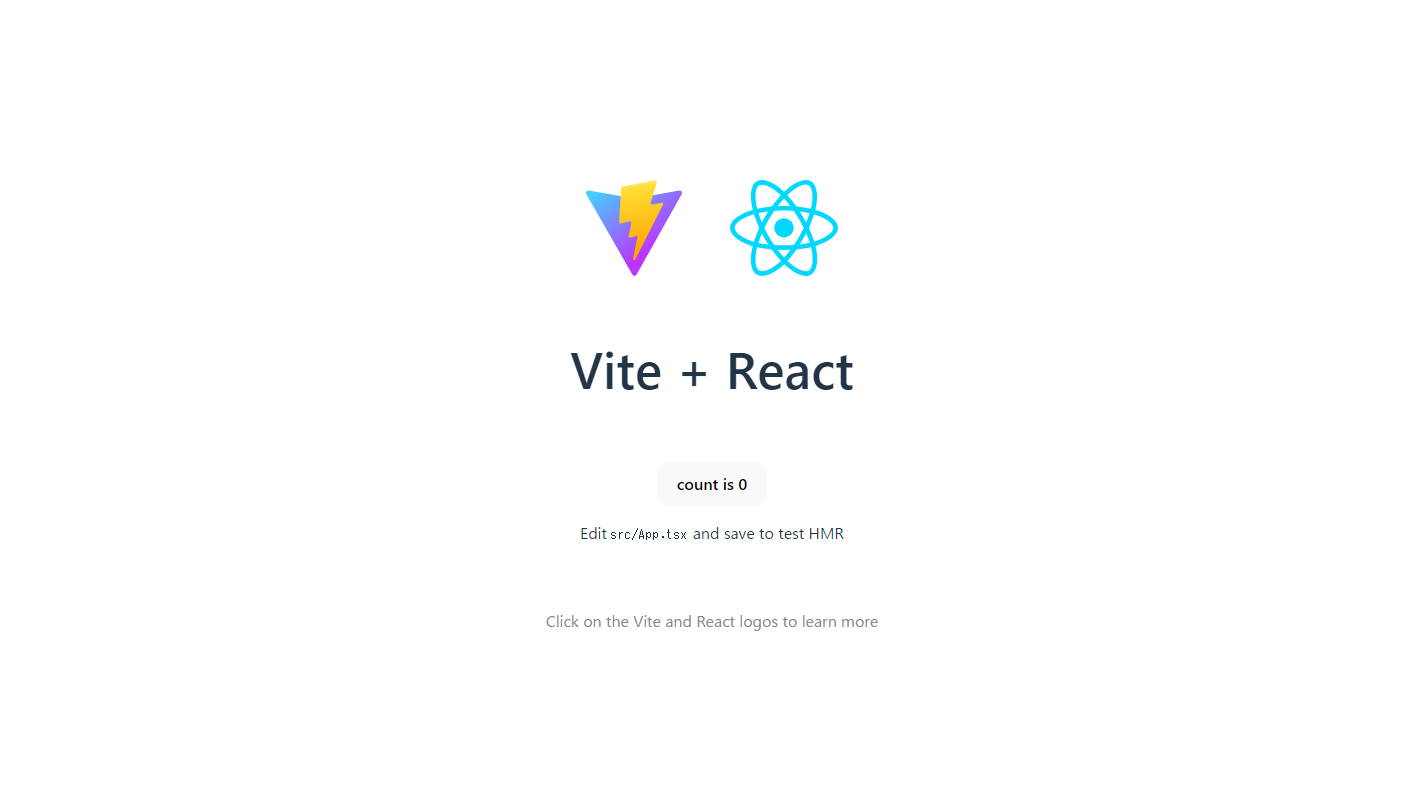
ここで一度実行してみましょう。コマンドを実行して、次のような画面がhttp://localhost:3000/として表示されていればOKです。
|
1 2 3 |
cd miso-frontend npm install npm run dev |
 |
続いて以下のコマンドを実行して、Cognito認証のためのAmplifyライブラリ、ログイン状態管理のためのRecoil、アイコンライブラリのReact Iconsをインストールします。
|
1 |
npm install aws-amplify recoil react-icons |
src以下にstoresフォルダを作成し、ログインの状態を管理するuserState.tsを作成します。
Cognitoで認証された後、ユーザ名、メールアドレス、Googleのプロフィール画像を保存しようと思います。
|
1 2 3 4 5 6 7 8 9 10 11 12 13 14 15 16 |
import { atom } from "recoil"; // User型を定義 interface User { name: string; email: string; picture: string; } const userState = atom<User>({ key: "userState", // ユーザーが未ログイン状態のデフォルト値 default: { name: "", email: "", picture: "" }, }); export default userState; |
src以下にconfigフォルダを作成し、AWSに接続するための設定awsconfig.tsを作成します。
環境によって変わる部分は環境変数から与えるようにします。
|
1 2 3 4 5 6 7 8 9 10 11 12 13 14 15 16 17 18 19 |
const awsconfig = { Auth: { Cognito: { userPoolId: import.meta.env.VITE_USER_POOL_ID, userPoolClientId: import.meta.env.VITE_APP_CLIENT_ID, loginWith: { oauth: { domain: import.meta.env.VITE_COGNITO_DOMAIN, scopes: ["email", "openid", "profile"], redirectSignIn: [ import.meta.env.VITE_REDIRECT_SIGNIN ], redirectSignOut: [ import.meta.env.VITE_REDIRECT_SIGNOUT ], responseType: "code", }, }, }, }, }; export default awsconfig; |
プロジェクトのルートフォルダに.envファイルを作成します。
|
1 2 3 4 5 |
VITE_USER_POOL_ID=your_user_pool_id VITE_APP_CLIENT_ID=your_app_client_id VITE_COGNITO_DOMAIN=your_cognito_domain VITE_REDIRECT_SIGNIN=http://localhost:3000 VITE_REDIRECT_SIGNOUT=http://localhost:3000 |
your_user_pool_id、your_app_client_id、your_cognito_domainには、前回作成したCognitoのユーザープールID、アプリケーションクライアントID、Cognitoドメイン(例:miso-dev.auth.ap-northeast-1.amazoncognito.com)を設定してください。
また、前回同様.envファイルがGitリポジトリに含まれないように.gitignoreを設定します。
|
1 2 3 4 5 6 7 8 9 10 11 12 13 14 15 16 17 18 19 20 21 22 23 24 25 26 |
# Logs logs *.log npm-debug.log* yarn-debug.log* yarn-error.log* pnpm-debug.log* lerna-debug.log* node_modules dist dist-ssr *.local # Editor directories and files .vscode/* !.vscode/extensions.json .idea .DS_Store *.suo *.ntvs* *.njsproj *.sln *.sw? .env |
main.tsxを変更し、先ほど作成したAWSへの接続情報を読み込ませ、Recoilで状態管理できるようにします。
|
1 2 3 4 5 6 7 8 9 10 11 12 13 14 15 16 17 |
import { StrictMode } from 'react' import { createRoot } from 'react-dom/client' import { RecoilRoot } from 'recoil' import App from './App.tsx' import './index.css' import { Amplify } from 'aws-amplify' import awsconfig from './config/awsconfig.ts' Amplify.configure(awsconfig); createRoot(document.getElementById('root')!).render( <RecoilRoot> <StrictMode> <App /> </StrictMode> </RecoilRoot> ) |
次がログイン処理のメインとなります。以下のようにApp.tsxを変更しましょう。
|
1 2 3 4 5 6 7 8 9 10 11 12 13 14 15 16 17 18 19 20 21 22 23 24 25 26 27 28 29 30 31 32 33 34 35 36 37 38 39 40 41 42 43 44 45 46 47 48 49 50 51 52 53 54 55 56 57 58 59 60 61 62 63 64 65 66 67 68 69 70 71 72 73 74 75 76 77 78 79 80 81 82 83 84 85 86 87 88 89 90 91 92 93 |
import { useCallback, useEffect, useState } from 'react'; import { useRecoilState } from 'recoil'; import { fetchAuthSession, signInWithRedirect, signOut } from 'aws-amplify/auth'; import { Hub } from 'aws-amplify/utils'; import userState from './stores/userState'; import './App.css'; function App() { const [user, setUser] = useRecoilState(userState); const getUser = useCallback(async () => { try { const session = await fetchAuthSession(); const idToken = session.tokens?.idToken; if (idToken) { setUser({ name: idToken.payload.name as string, email: idToken.payload.email as string, picture: idToken.payload.picture as string, }); } } catch (err) { console.log(err); setUser({ name: "", email: "", picture: "" }); } }, [setUser]); const signIn = async () => { getUser(); if (user.name === "") { signInWithRedirect({ provider: "Google" }); } }; useEffect(() => { const unsubscribe = Hub.listen("auth", (data) => { const { payload } = data; switch (payload.event) { case "signInWithRedirect": getUser(); break; case "signInWithRedirect_failure": console.log("Sign in with redirect failed"); break; case "signedOut": setUser({ name: "", email: "", picture: "" }); break; default: console.log(payload); } }); getUser(); return unsubscribe; }, [getUser, setUser]); return ( <> {user.name !== "" ? ( <> <h3>ようこそ😄 {user.name}さん</h3> <img src={user.picture} alt={user.name} /> <h1>Password Generator</h1> <div className="card"> <button> Generate </button> <button onClick={async () => { signOut(); }} > Sign Out </button> <p> 生成されたパスワードがここに表示されます </p> </div> </> ) : ( <> <button onClick={async () => { signIn(); }} > Sign in </button> </> )} </> );} export default App; |
少々長いので、コードの中身をGitHub Copilotに解説してもらいました。
-
インポート:
- Reactのフック(
useCallback,useEffect,useState)とRecoilのuseRecoilStateをインポート。 - AWS Amplifyの認証機能(
fetchAuthSession,signInWithRedirect,signOut)とイベントリスナー(Hub)をインポート。 - ユーザー状態を管理するRecoilの
userStateをインポート。 - スタイルシート
App.cssをインポート。
- Reactのフック(
-
コンポーネント
App:- サインイン状態をRecoilの
userStateで管理。 getUser関数で認証セッションを取得し、ユーザー情報を設定。signIn関数でユーザーがサインインしていない場合にGoogleでのリダイレクトサインインを実行。useEffectフックで認証イベントをリッスンし、サインインやサインアウトのイベントに応じてユーザー情報を更新。- ユーザーがサインインしているかどうかに応じて、異なるUIを表示(サインインボタンまたはユーザー情報とサインアウトボタン)。
- サインイン状態をRecoilの
-
UI:
- サインインしている場合、ユーザーの名前と画像、パスワード生成ボタン、サインアウトボタンを表示。
- サインインしていない場合、サインインボタンを表示。
それでは実行してみましょう!
実行してみると、無事にSign inボタンが表示されました。
 |
Sign inボタンを押していざ!!
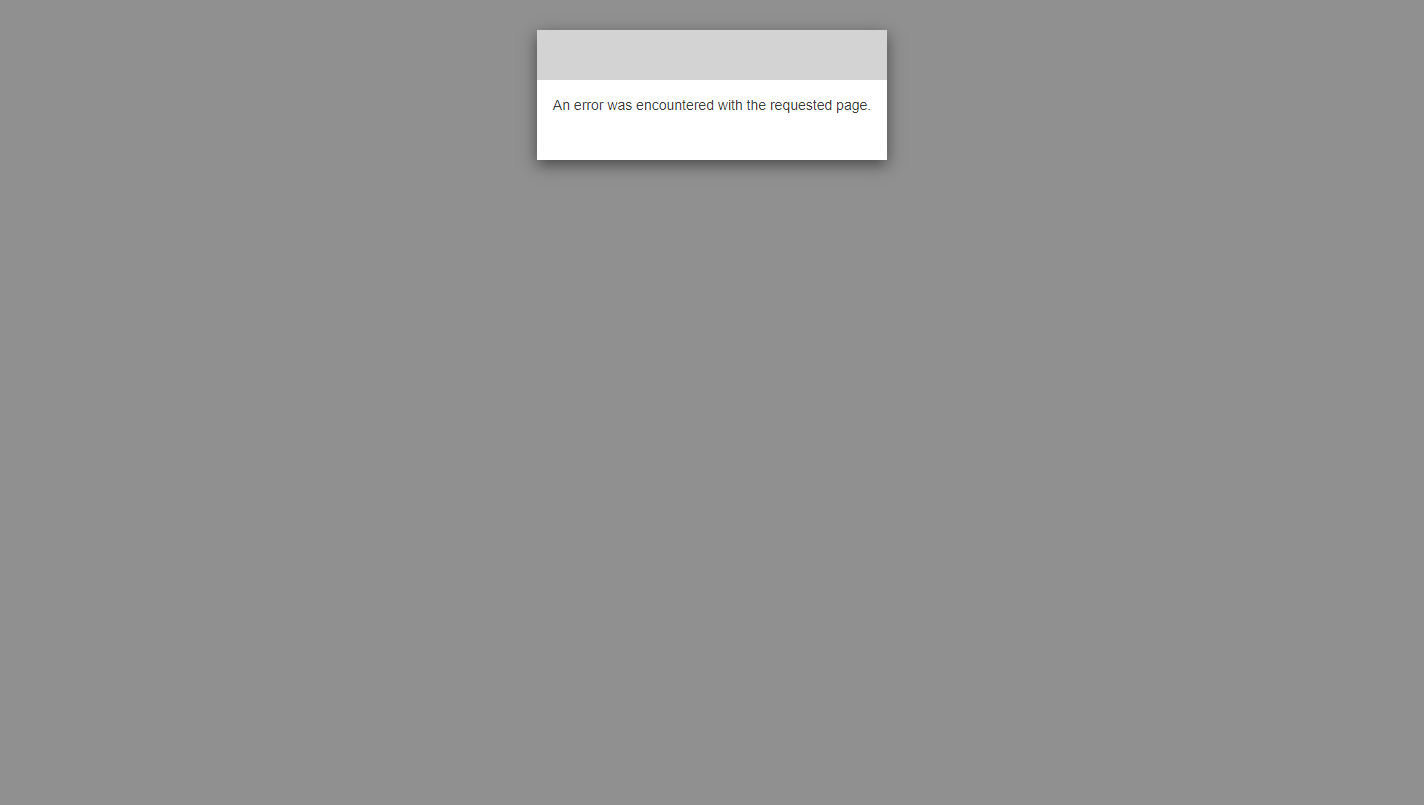
あれれ???「An error was encountered with the requested page.」というエラー画面に遭遇。
何が原因か・・・と調べていくと、凡ミスをしていました。
Cognitoのアプリケーションクライアントの許可されているコールバックURLがhttp://localhost:3000/を設定していたのに対し、.envファイルで設定していたVITE_REDIRECT_SIGNINの値はhttp://localhost:3000と最後のスラッシュが抜けていました😅
.envファイルを修正して再度実行!
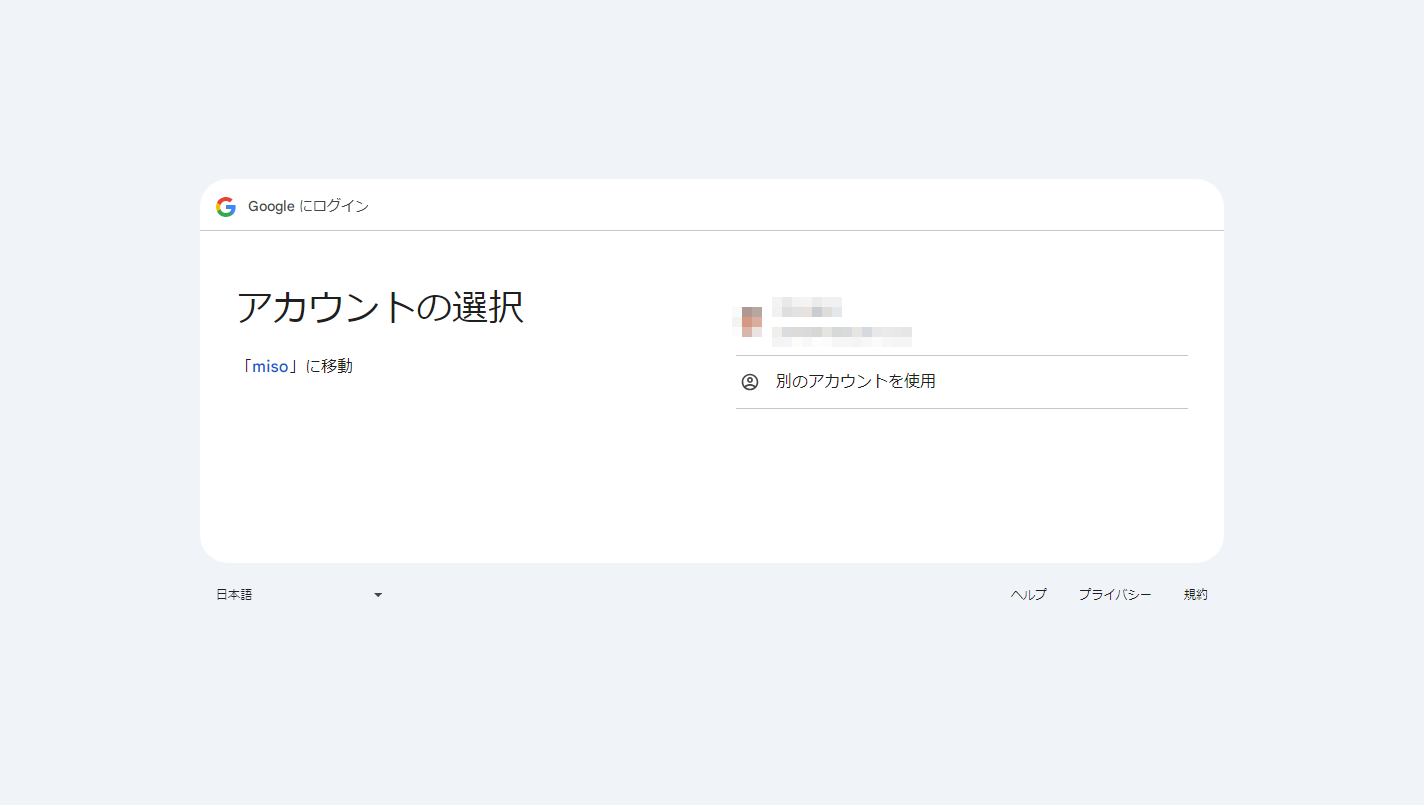
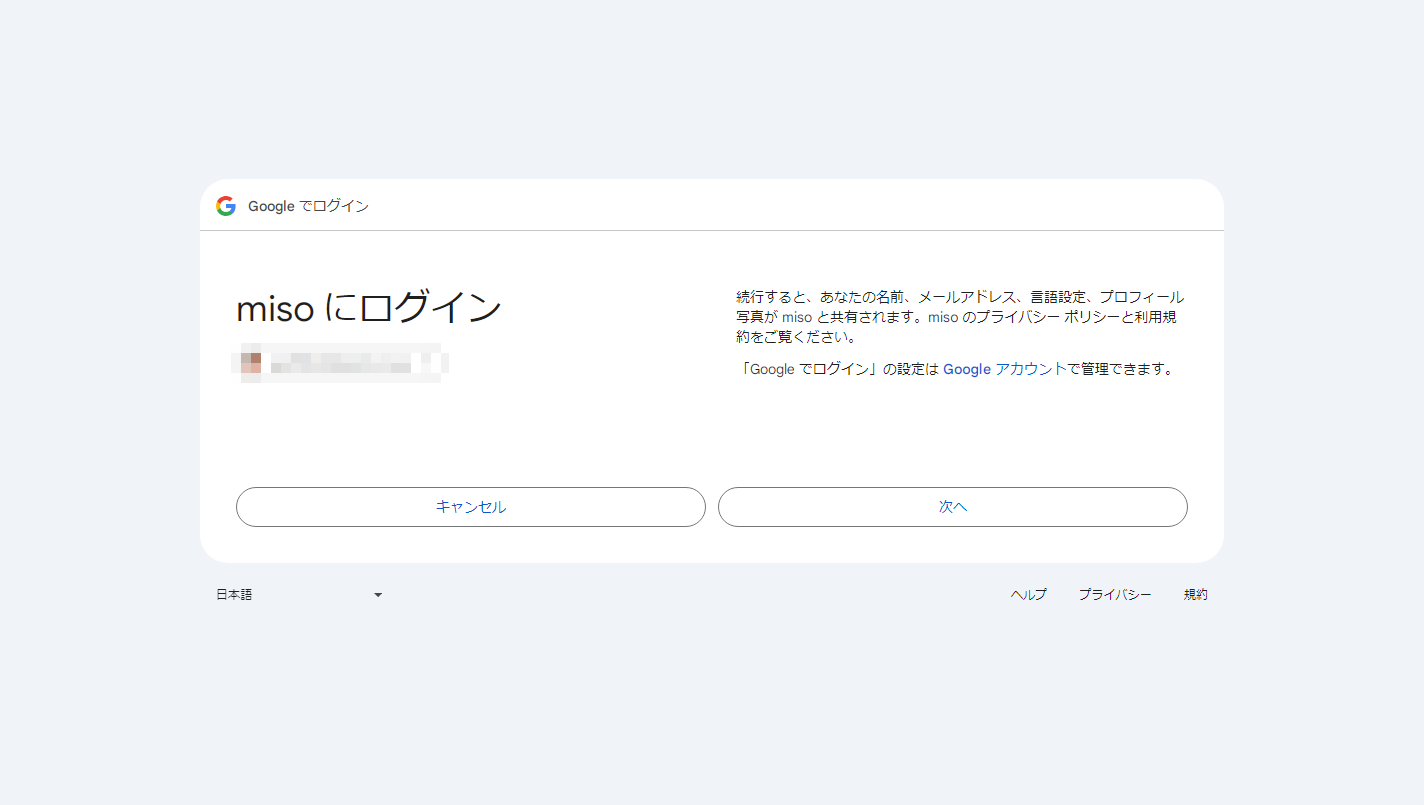
Googleのアカウント選択画面を経由し・・・
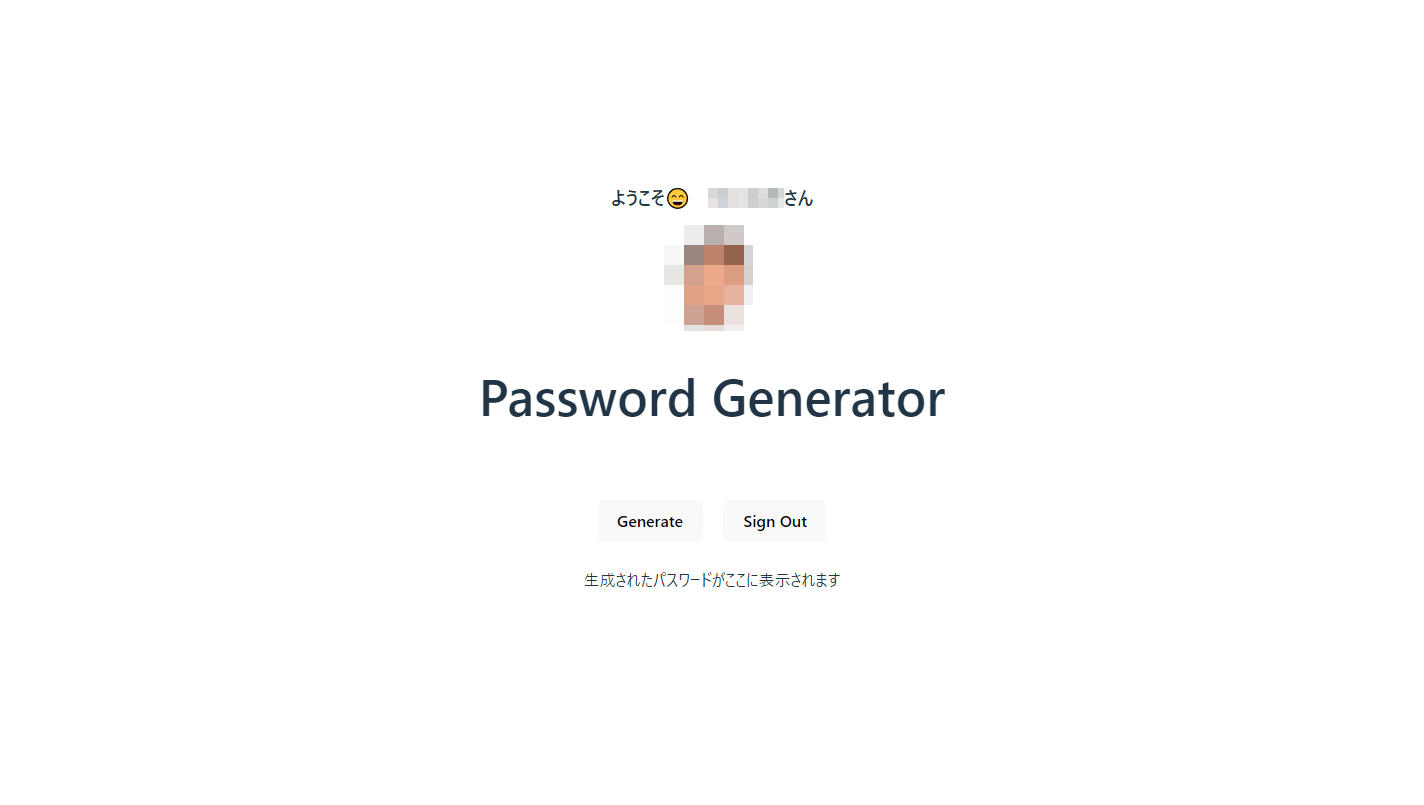 |
無事に認証後の画面が表示されました!
次回は、Cognitoで認証されたユーザーだけが実行可能なバックエンドのAPIをSpring BootとSpring Securityで作成していこうと思います。
それでは、また次回に👋
シリーズ記事
- React×Spring Bootな構成をAWS Fargateで動かす(1) ~ Cognitoの構築
- React×Spring Bootな構成をAWS Fargateで動かす(2) ~認証付きフロントエンドの作成
- React×Spring Bootな構成をAWS Fargateで動かす(3) ~バックエンドの作成
- React×Spring Bootな構成をAWS Fargateで動かす(4) ~認可機能の追加
- React×Spring Bootな構成をAWS Fargateで動かす(5) ~構成上の問題の解消方法
- React×Spring Bootな構成をAWS Fargateで動かす(6) ~ Fargateのデプロイ(準備編)
- React×Spring Bootな構成をAWS Fargateで動かす(7) ~ Fargateのデプロイ(実装・デプロイ編)

執筆者プロフィール

- tdi デジタルイノベーション技術部
-
昔も今も新しいものが大好き!
インフラからアプリまで縦横無尽にトータルサポートや新技術の探求を行っています。
週末はときどきキャンプ場に出没します。
2024-2025 Japan AWS All Certifications Engineers